Ten layers of 13 oz. uni dry stacked to the inside hull where the mast bulkhead will be installed. Over this, a 16 in. band of 24 oz glass will aid in distributing the forces placed upon this highly stressed bulkhead location. 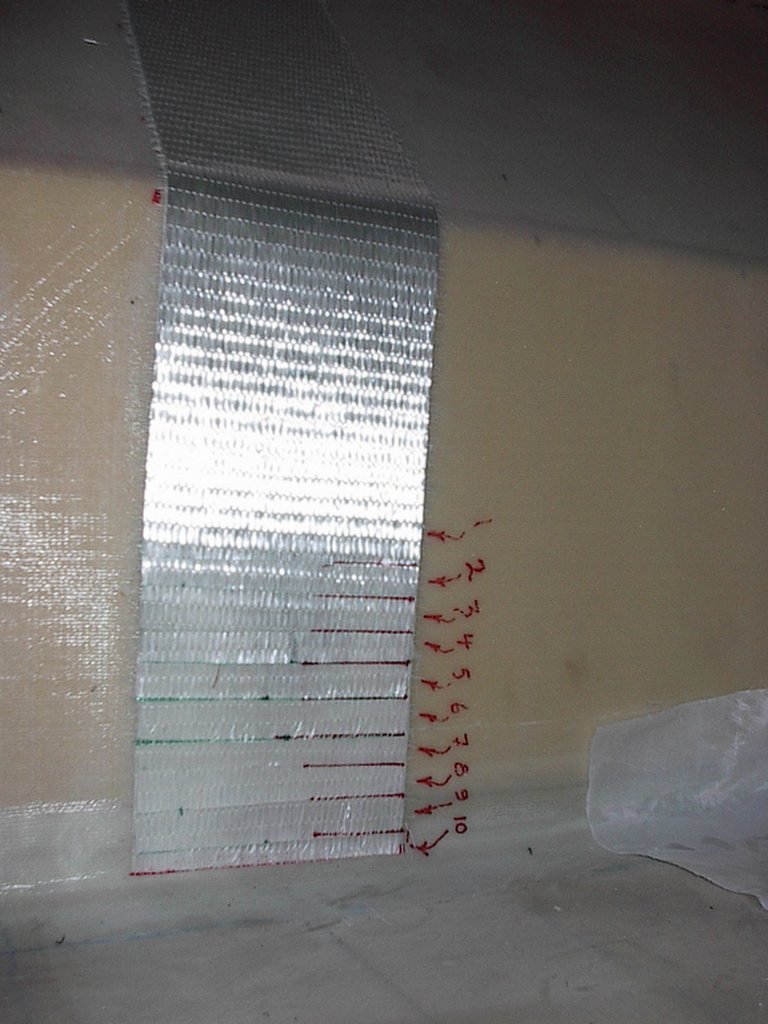

9.21.2006
ten layers of Uni

uni directional reinforcement under bulkheads
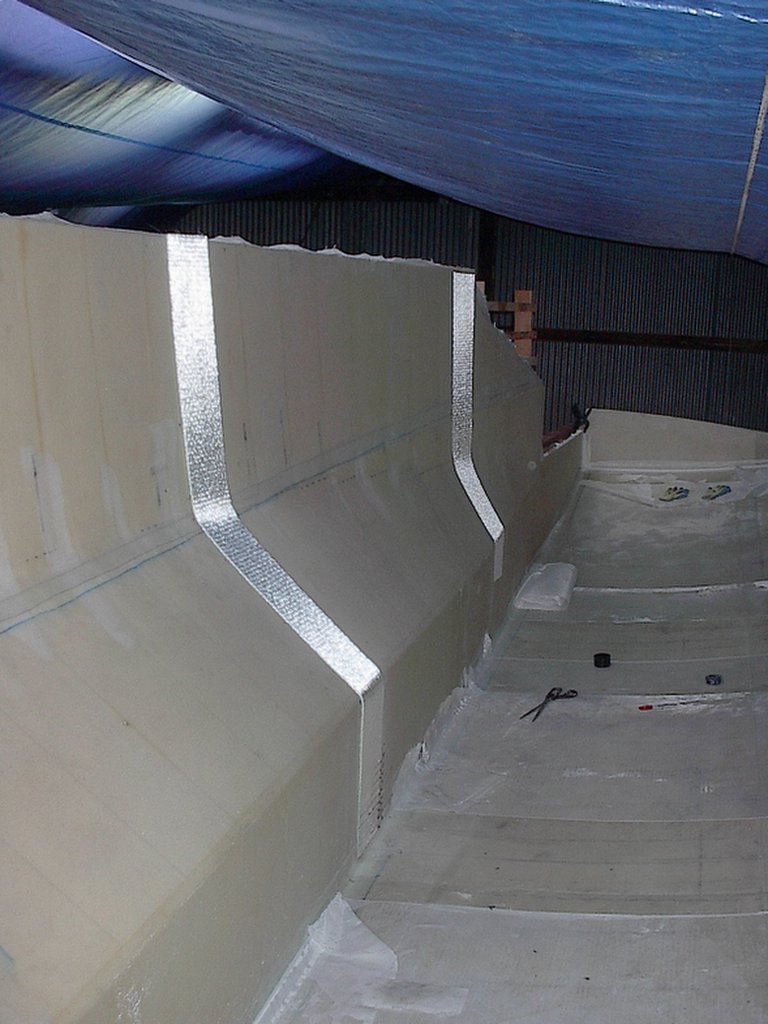 Where the bulkheads attach to the hull /cabin, there are layers of 8in. Uni glass and a 16 in wide strip of "D"- 24oz. Triaxial. This photo shows the uni dry stacked to the inside of the hull with 3M-77. I attempted to set for an infusion of the ten layers of uni but was unable to pull vacuum against the pre-glassed inside surface. I suppose I'll humble myself by wetting this out in the conventional manner.
9.19.2006
Stem Bulkhead
Port side stem bulkhead in place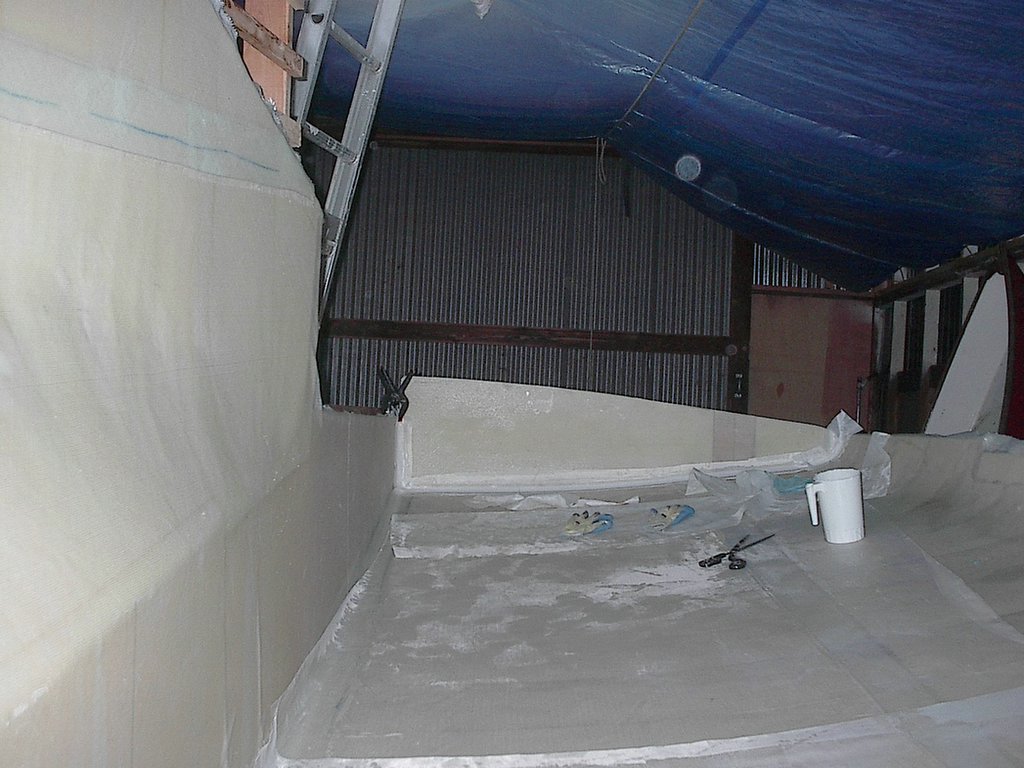 . I forgot to run by Fiberglass Supply after work to pick up a roll of DBM1708 Tape so I just blopped the stem bulkhead into a batch of microbaloon/aerosil epoxy peanut butter and ran a strip of peel ply over the fillet so tomorrow I'll rip up the peel ply and tape it in proper. Next, I'll start installing all the other bulkheads.......note darker diab 1200 high density insert for pole wires.
9.16.2006
glassing the inside of the outer port hull

wet out of the first ten ft of the inside of the outer, port bow. ( the boat is on it's side and your looking towards the front of the boat from about mid ship )
I'm using plastic spredders and a box full of rubber gloves to work the resin through the dry glass and onto the foam. Once the 24 oz. Triaxial glass is fully saturated and laying firm against the foam, I come back and cover the entire area with peel ply. I don't enjoy sanding glass so the added expense of covering the entire boat surface with peel ply is worth it to me.
I'm finished for the day so I've used a strip of plastic as a release, foam and some weights to hold the edge of the unsaturated glass so that I don't wake up and find a bunch of wrinkles. Tomorrow I plan on finishing the entire inner hull so that I can start installing the bulkheads.
9.14.2006
vacuum bagging several panels at once
The two previous posts show some of the bulkheads that resulted from this vacuum bag layup. I somehow managed to nest four bulkheads in one bag without too much trouble. OK.....there was a moment of panic when the sun started peeking through the shop window and shineing directly on the lay-up before I had it all sealed up. Although I'm using "medium" system III silvertip hardener, I wasn't sure if the direct sunlight was going to kick my resin too soon.....Turns out I had plenty of time.
In the background, you can see the bulkhead pieces for the starboard hull. When laying out the bulkheads, I stacked two sheets of corecell together and produced foam bulkheads for both hulls all at once. 
9.10.2006
peeling peeeeeeeel ply
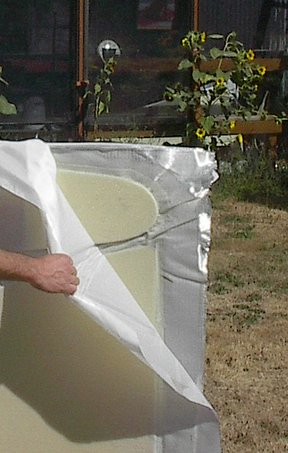 Although it's best to wait until you intend to install the bulkheads before removing the peel ply, sometimes I just can't wait...... I think I enjoy it just about as much as opening christmas presents. Perhaps it's the sound it makes or maybe the sence of accomplishment that it fosters when a perfectly flat, strong and lightweight composite bulkhead is revealed.
4 bulkheads in 1 bag
After releasing a gang of four bulkheads from a vacuum bag, they walked out side to enjoy a solar post cure bath in the sunshine.........
9.09.2006
foam in the sunshine
Here's a picture of the sun shining in on the port side hull foam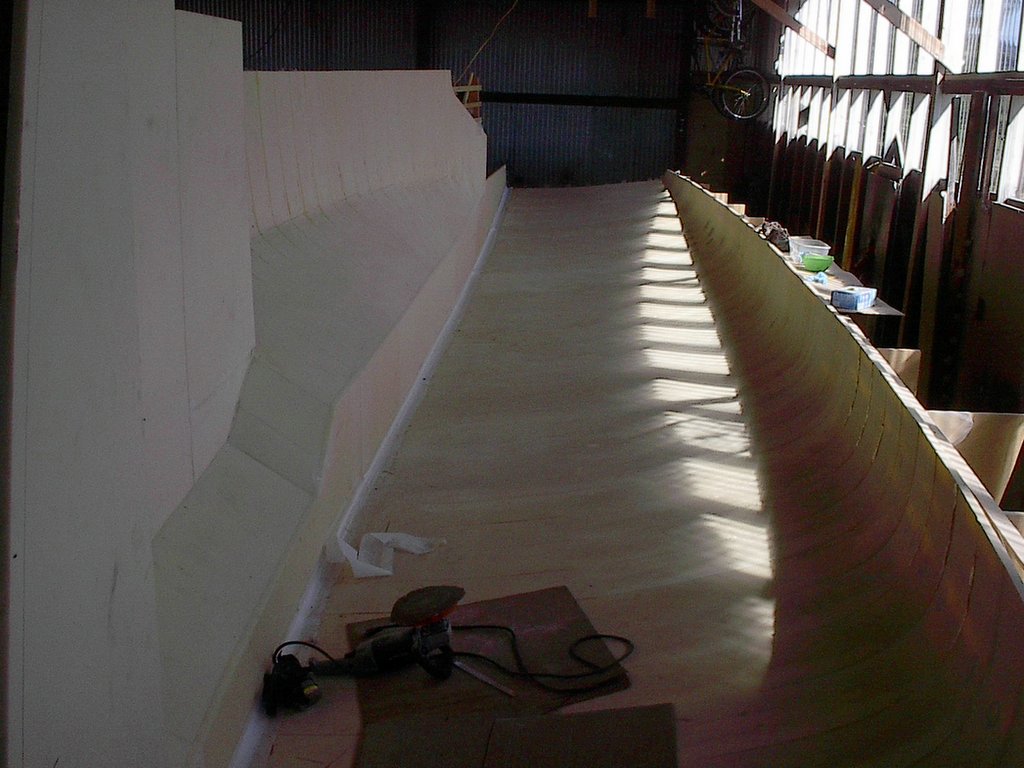 . ( 3/4 in. 5#/ft^3 corecell ) Due to an all but exclusive deal with a wind generator supplier, the supply of 12#/ft^3 high density structural foam has dried up in the pacific northwest. I am waiting on an order of this material to use as reinforcement along the hull centerline and other places where hardware will eventually be installed.
9.05.2006
funny experimental tool
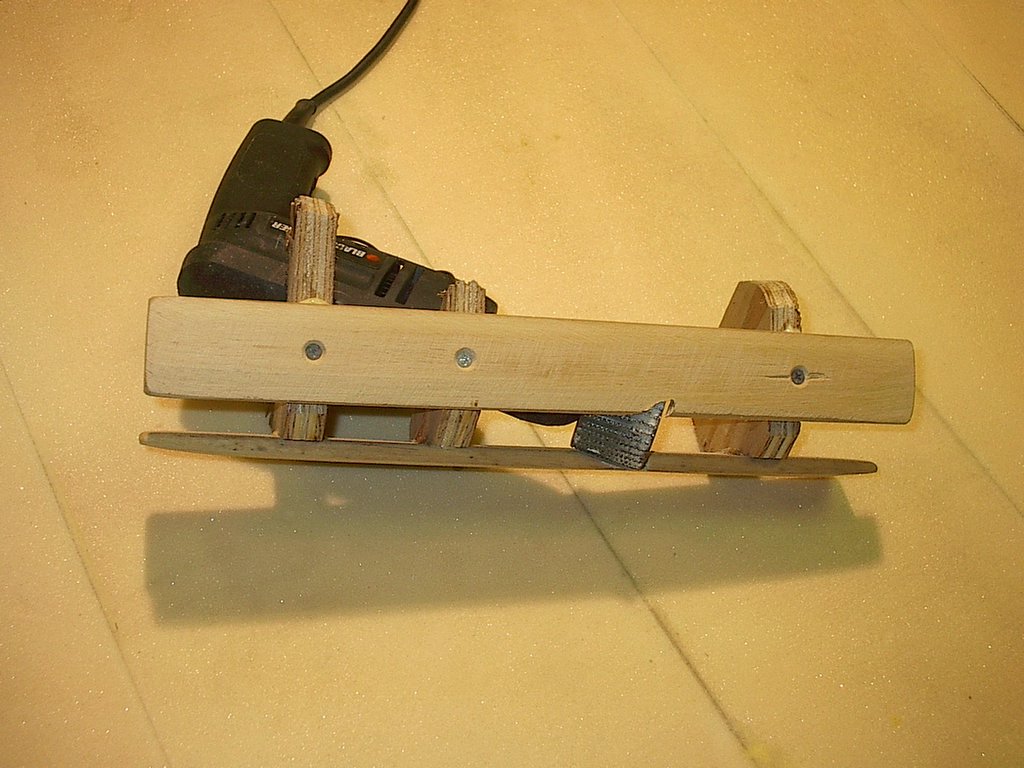 So....turns out, I was not able to buy a "super sonic roto foam fillet shapeing tool" at home depot so I made this freaky tool to create a nice radius on the inside juncture of the deck and the hull. ( When gluing the hull planks to the deck planks, I used a triangular strip of foam at the inside corner and wanted it to be rounded in stead of angular ) It works pretty good. I made it out of a crappy b&d drill, a 2" rotary rasp, some bailing wire and some scrap hardwood and ply....Give me an hour to do something and I'm most likely to spend thirty minutes building a tool that will allow me to do a job twice as fast with half the effort.......the problem with that is that I end up with all these unusual tools that often never get used again. ..... if you need one, keep a lookout on e-bay for a good used "super sonic roto foam fillet shapeing tool" in a couple of years.
port side, outer hull half in foam
 So here's my first hull half section. I've spent a little time fareing things down but haven't really spent the time getting it as smooth as I'ld like. Notice: The F-44SC does not have the chamferred gunwhale and in this photo, you can see the filleted join line between the hull side and the deck still covered w/ peel ply. When I'm ready to glass the inside, I will rip the peel ply off, lay down 24 oz. triaxe glass as specified, bag the entire part and infuse the hull half in one shot. I'm not one for wet layups so I'm doing all I can to minimize my exposure to the system III silvertip epoxy resin system that I have chosen to use throughout.
9.02.2006
carbon paper.....
 Never pass up the opportunity to use carbon paper. When you are old, you can also tell stories of the days when pencils were made of real wood...... a late night laying out the aft bunk bulkhead using carbon paper and full size templates.
aft bulkhead
 Here's the aft bulkhead in the bag @ -28 in. Hg. Although this panel should turn out to be one of the nices ones yet in terms of a high fiber to resin ratio, I have convienced myself that it is not worth trying to reuse vac bags too much. It took me another 10 min with a tube stuck in my ear trying to locate and fix a couple of accidental snags that I had made while using it on a previous panel. Also...I replaced the top of my vac resin trap with a sheet of aluminum.
9.01.2006
mast bulkhead
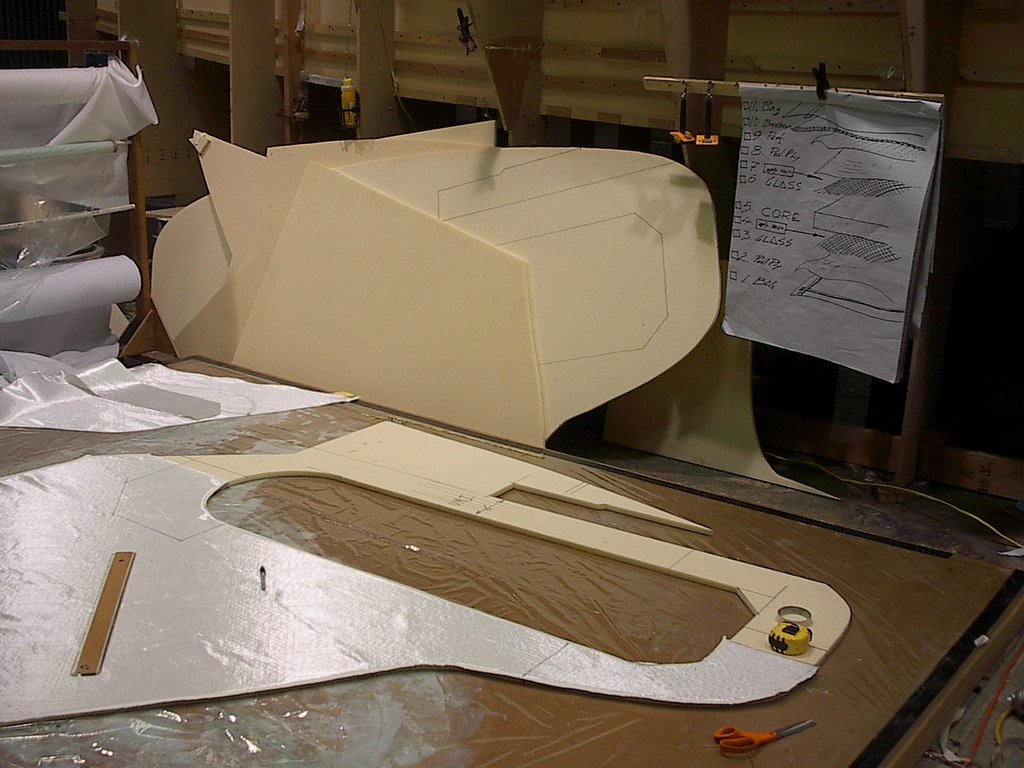 So here's some prep work on the mast bulkhead. This bulkhead is bomber. since I've decided to go with swing up boards, this bulkhead calls out for a total of ten layers of13oz. Uni directional glass between the passageway opening and the side of the "center" board box . The final bulkhead also has reinforcements around the top and bottom of the opening as well.
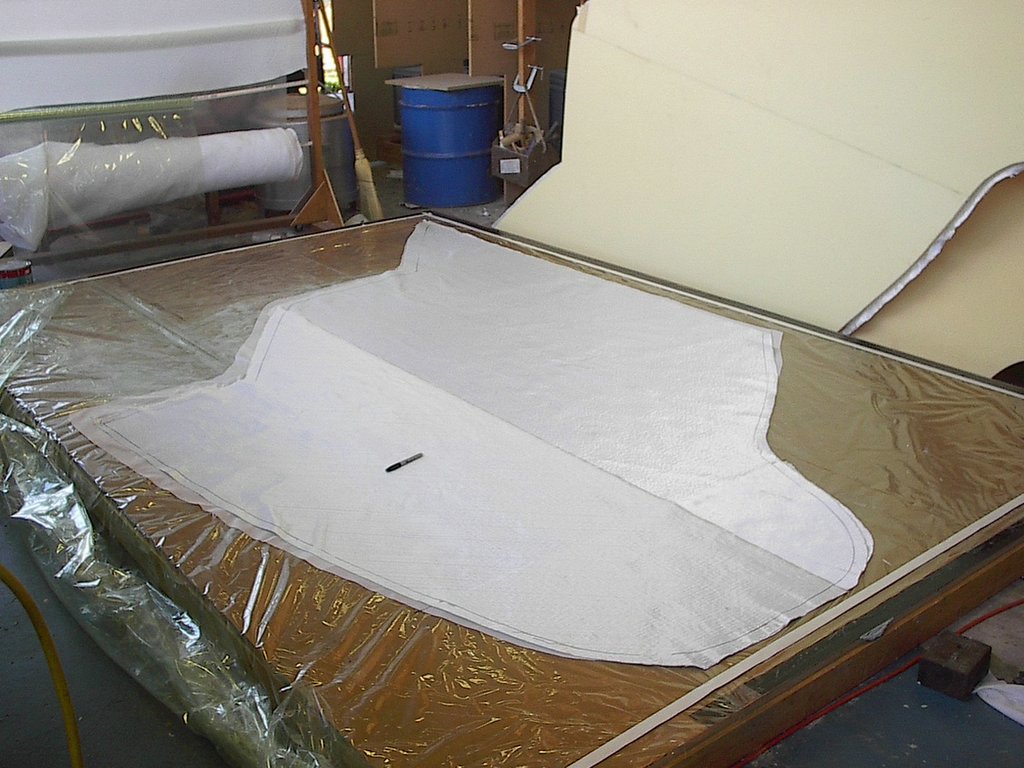
here's the cabin bulkhead "in the bag".....in the foreground you can see my resin trap that I built from a block of MDF and an acrylic bucket from wal-mart. This is a good example of how NOT to make a vacuume resin trap. Turns out that the edge porosity of MDF was enough to leak 10 in. of Hg leaving me thinking that I had a leak in my bag. Afterwards, I tested my vac pump without the trap and it pulled a full 30 in. Merc....... 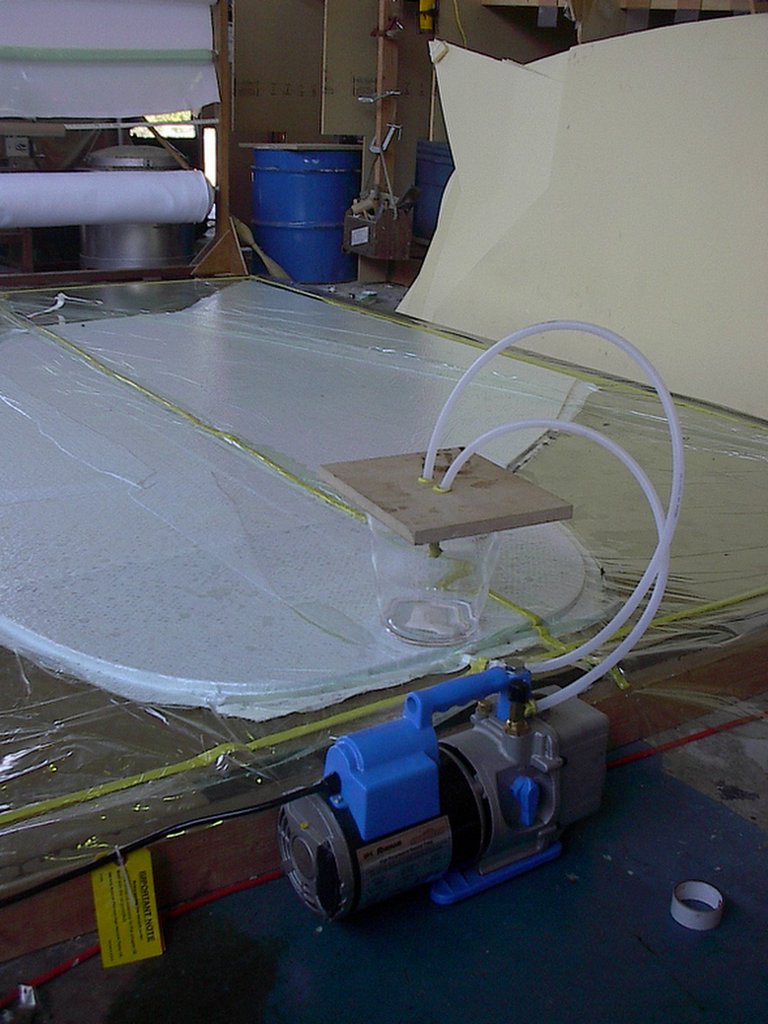
8.31.2006
first posting
This is the first posting on this blog. Since I'm not really sure how all this works, it may take me a while to figure things out.
Subscribe to:
Posts (Atom)


 Posts
Posts


