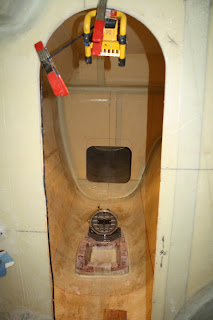
Here I am demonstrating my remarkable ability to make the world go away. If I try really hard, I have found that I can also make the universe go away too.
So I just realized that I forgot to show the small forward bulkhead tips that were laminated with the stack of batteries.
One would not be able to determine whether they had been vac bagged or not. They came out nice and light.
5.15.2010
Port side transition
The transition between the forward hull deck to the front of the bridge deck is a bit tricky. In the plans, Ian leaves it up to the builder to work out a nice shape. From this angle, it's difficult to get a feel for the lines and adding to the confusion is the fact that I needed to add a few wedges of foam to ease the transition the way I wanted. Future photo's should make a better impression. The array of tools from left to right are: hand auto body work sander with 36 grit, nice lithium ion cordless screw gun, spring clamps, Moisture cure polyurethane glue, spray mister full of water, heat gun for adjusting the shape and fitting of foam.
5.14.2010
Gravity
sometimes you just want to get the job done......In this case, I'm laminating both of the small triangular bulkheads that were cut from foam using the cardboard templates ( see last post)
If you do the simple math, 4 old salvage trojan battery's don't even come close to providing the compressive forces that can be generated by vac bagging. However, in this case, knocking the job out quick takes precedence.
Just for kicks, you can see my Ryobi drill which has become the master epoxy mixer. It's not such a good drill but it works just fine for mixing batches of epoxy.
If you look closely, you can see that there is an open portion at the front of the forward deck. The piece that I made last night, will eventually go there but first I need to make two small bulkheads that provide support and seals off this area underneath. I'm using two pieces of cardboard to make a template that I can use to transfer the shape onto core cell foam then I'll vac bag them and bond them in place ..........looks like it's time to clean up the shop. Extension cords sometimes look like piles of spaghetti on the shop floor and I sometimes find myself entangled and confused as to which cord goes to which tool. I think I have about 500 power tools but I have a wind generator on the shop roof that offsets some of my electron usage.
5.12.2010
Forward bridge deck section
In the upper picture, you'll notice that the forward section of the bridge deck is absent. The 13 inch x 12 ft. strip will eventually cover this section and form an area where the trampolines will attach. Although I didn't laminate the full 12 feet with one full length of fabric, I elected to use a few of my excess pieces of 24 oz. glass. Doing so adds about a dollars weight in change due to the overlaps and extra resin but it actually creates a stronger part and I think it's good not to waste if you have the opportunity to make good use of excess material. I then smoothed the entire piece down with peel ply. The glassed portion will be on the inside of the boat.
Subscribe to:
Comments (Atom)


