At long last. Here I am with the finished rudders. Next, I'll skim them over with a little fairing compound, sand them smooth and prep them for a good coat of anti fouling paint.
The lower portion of the kick up rudder boxes are just below the water line so in order to prevent the internal void from partially filling with water, I used two part foam as fill. While I was at it, I also decided to completely fill the aft void as well thinking that if the box were ever to break loose and crack, it would float and it may allow me to retrieve the rudder.
........and, sometimes things just don't go as planned:
in this example. for reasons unknown, the resin flow propagation reached an equilibrium before finishing out the full infusion.....in other words, I goofed. In this case, it's no big deal. Tomorrow, I'll just slice open the bag, insert another resin flow line just above the dry portion, pull another vacuum and infuse the remaining portion.
The only difference between yesterdays success and todays....."somewhat less success" was that the shop temperature was about 5 degrees cooler. This may have increased the resin viscosity just enough to prevent full infusion.
JUST had an idea......why not open up the bag, estimate the remaining amount of resin needed to finish the infusion, introduce it directly into the bag and re-seal it?
Since I had clamped the rudder post to my work bench with a flexed board, it was easy to spin the rudder 180 deg, open the bag and pour in a bit of mixed epoxy
Here's a quick movie of the start of the infusion process:
Although System Three Silvertip epoxy resin was not really formulated for infusion. I was able to use a few tricks that produced nice results:
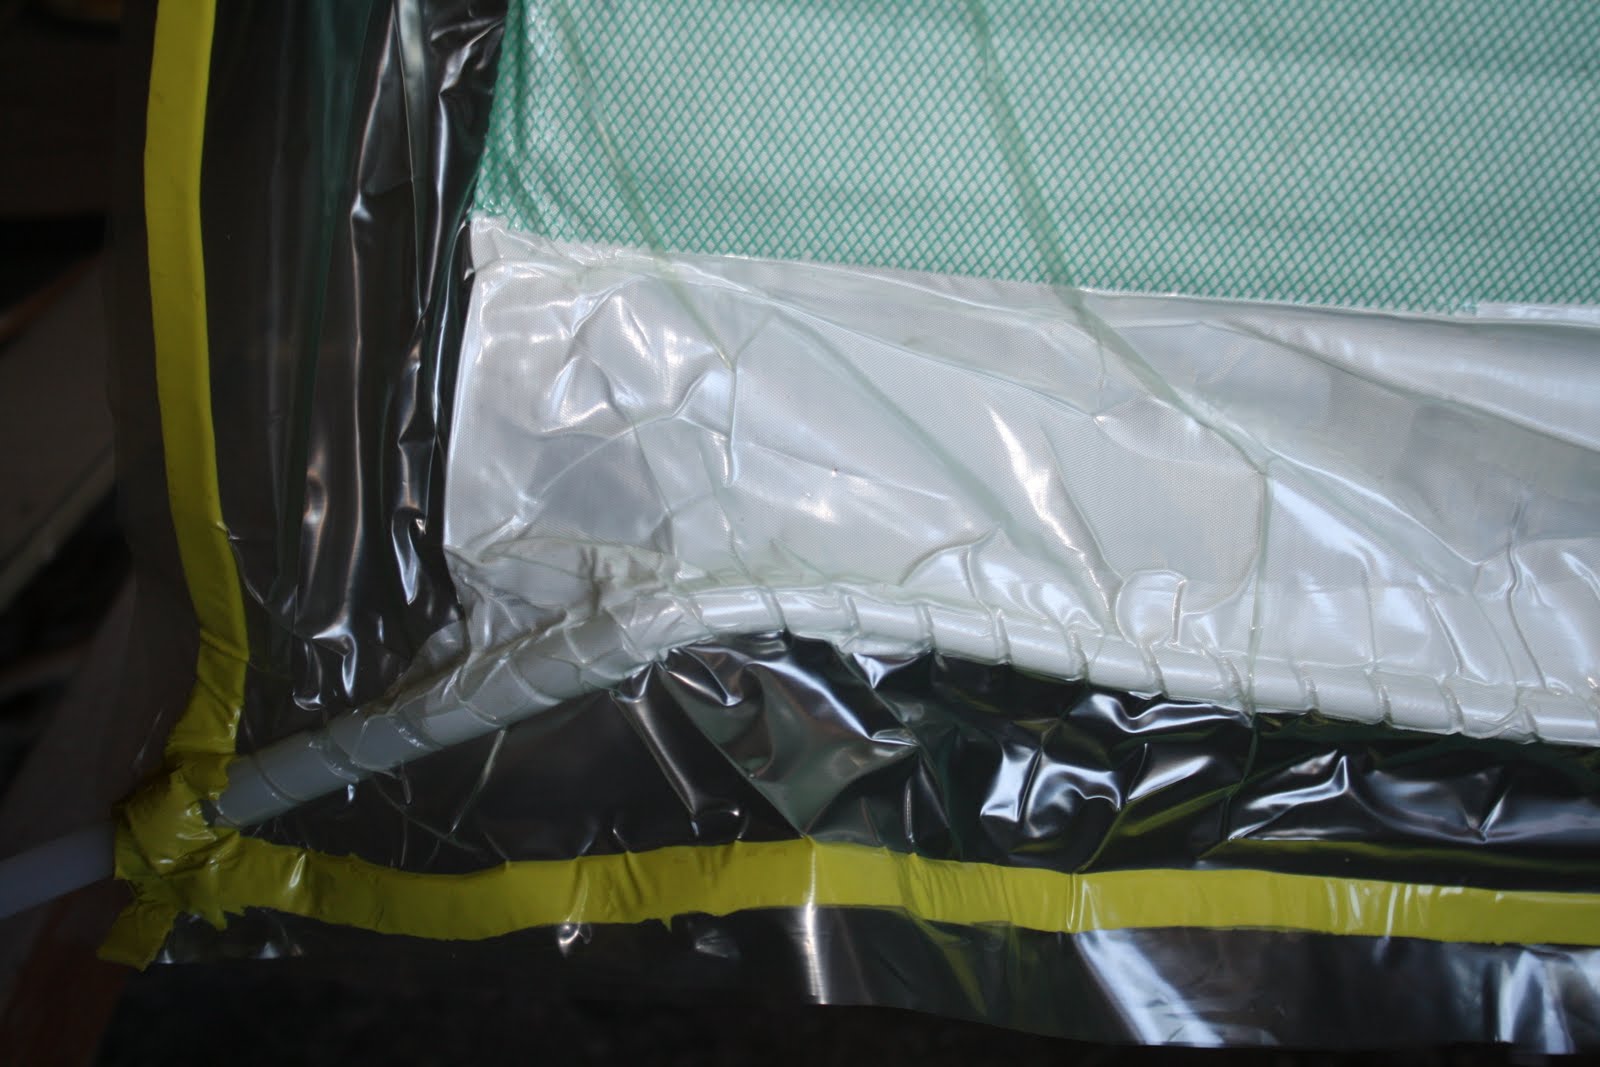
bagging the rudder ; notice the resin intake tube wrapping around the top leading edge.
The vacuum manifold was placed about 4 inches below the lower trailing edge of the rudder. This separation allows full vacuum pressure to be obtained while creating a "resin brake". (Once the resin makes it through all the glass and over all of the flow media, when it hits the double layer of peel ply, it stops flowing towards the spiral wrap vac manifold at that location)
Resin intake line: The green stuff is a flow media that is sort of like plastic bug screen but it has a raised cris cross texture that allows resin to flow edgewise through it. This allows the resin to flow more freely over the glass fabric.
the feed bucket
sophisticated flow valve
resin flow ( darker green area)
Here's the secret trick......to prevent exotherm, fill the feed bucket with small batches of mixed epoxy and pour waiting resin into a giant zip lock bag so that the surface area is maximized and heat from the exothermic chemical reaction can be dissipated quickly.
marking the flow
five minute interval marks allow me to get a feel for how long it will take to infuse completely. Notice the shorter and shorter flow progression every five minutes.
Resin brake beginning to work
Full infusion. I clamped a couple of flat pieces of wood along the trailing edge to insure that the glass overlap cures nice and flat.
After finalizing the shape of the rudder core, I chose the following laminate schedule:
a good thick layer of kevlar
followed by multiple layers of glass......
and then for good measure, I covered the entire rudder with another full layer of 12 oz. biaxial glass to allow me some extra sanding protection that I may need while doing the final faring.