5.26.2012
Improving the fish eye view.
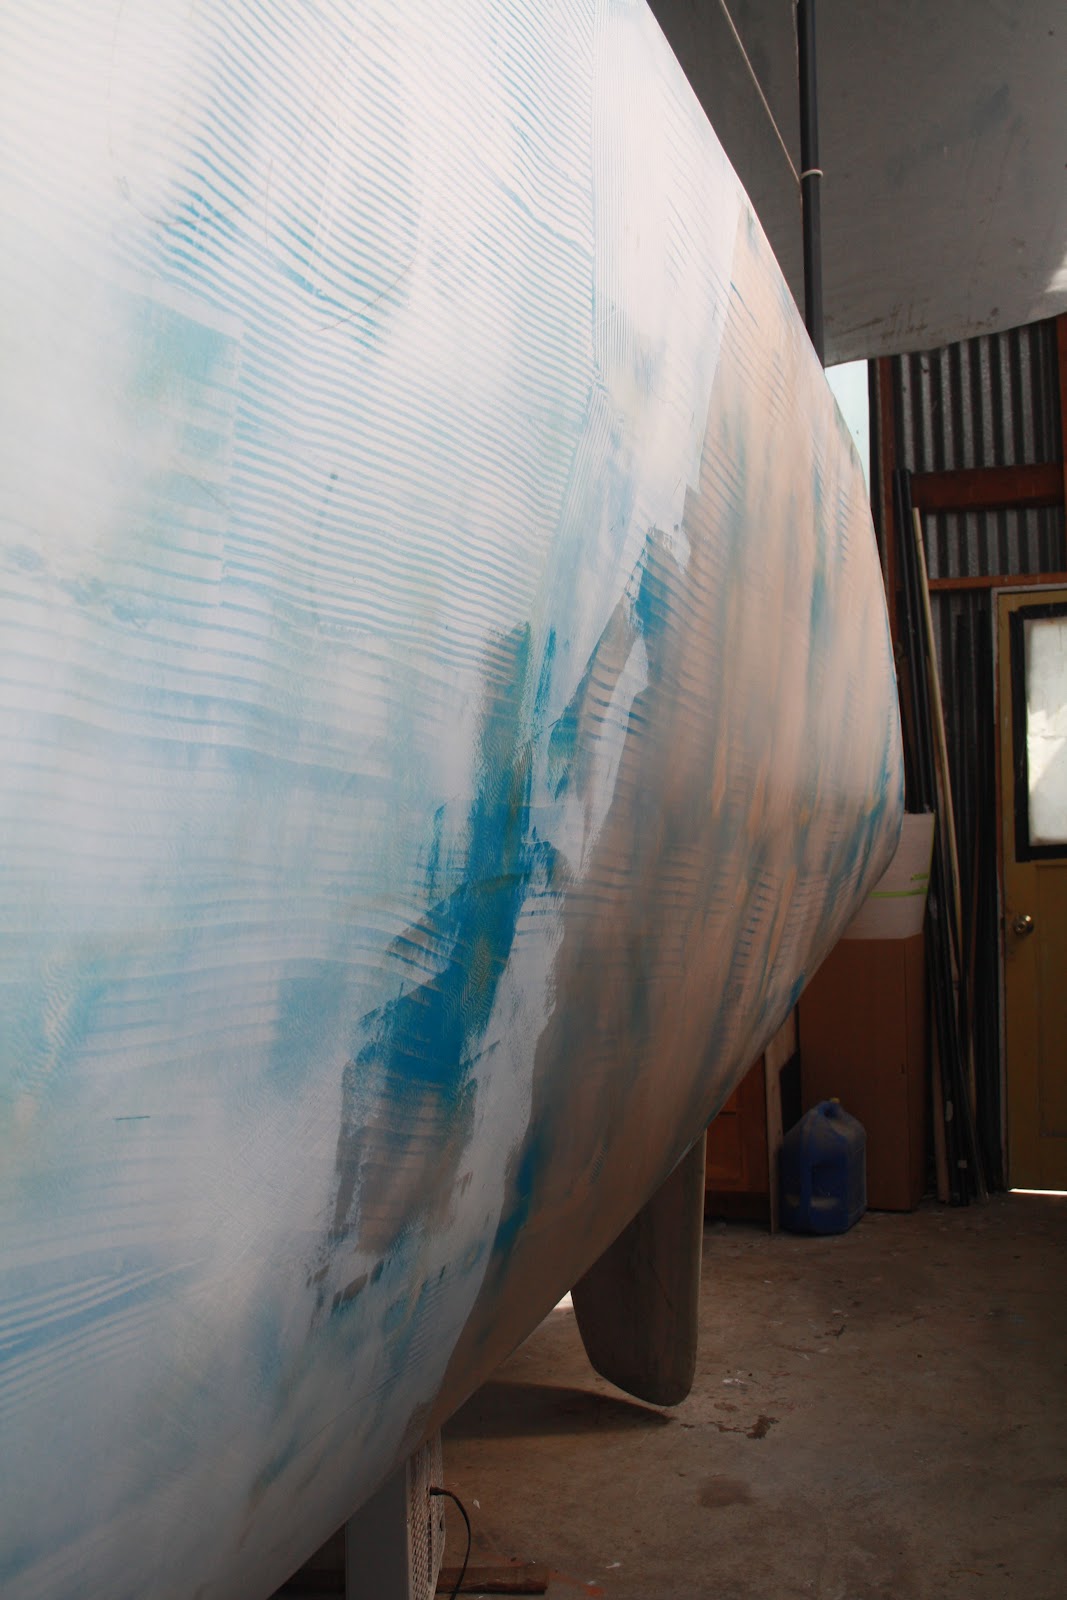
My intentions were to allow myself a few cosmetic imperfections on the under side of this ship but since I have chosen to use insanely expensive Awlgrip paint as my topcoat, it seemed like a shame to paint over a sub par surface.....so. You guessed it. Decided to trade a few more days under a palm tree for a few more days in the shop.
You're looking at the under side of the port side aft hull.
I've used my v-grove trowel to apply micro / epoxy over the hull surface
Here's the port side escape hatch and if you look closely, you will notice that I am working my way forward with the filler. After this step is complete, I'll use the long board to knock it all down, apply another skim coat and then I'll have a fair surface for the fish to look at.
I think any vehicle that has an escape hatch is worthy of note. Ian Farrier doesn't mess around.
Here's a shot of the under side of the port side hull.
5.23.2012
Endless sanding...... ( only four more weeks allowed)
Rather than burden the viewer with endless photographs of sandpaper, sanding boards, dust, dust masks, itchy sleeves and bulging shoulder muscles, I have limited the number of recent posts. Sanding and prepping for the top side painting of a boat is not very exciting nor much fun. However, if you are really short on entertainment options, here are a few pictures of some of the tools with a brief description of some of the fairing methods that seem to be working for me.
After mixing my own bulk fairing compound using epoxy resin and glass micro balloons, and bringing all of the boat surfaces up to grade, I've switched over to a product called Quick fair made by Sysem Three. It's a thixotropic fairing compound that is formulated under vacuum and when mixed, it is easily spread over the hull surface in such a was as to minimize any further rough sanding. The stuff is insanely expensive but in this application, it is literally saving me a few days of my life that could otherwise be better spent sailing with my friends or sitting with my feet in the sand under a palm tree.
Quick Fair
It mixes 2 : 1 so I just marked two areas out on my mixing board with a sharpy pen and then I scoop the stuff out, smooth it out over the areas in roughly the same thickness and call it good to mix.
I then use various steel blade "sheet rock" spreaders to smooth it out on the hull. Since I've been using super low grit sand paper on long boards ( sometimes 20 grit), this filler eliminates these sand marks and will only require a quick go over with the Festool RO150 DA sander
here's a pile of the tools that I have been using to fair the hulls and deck
forward port side hull right before it runs you over.
4.13.2012
Bulkhead mounted steering wheel pedestals
The F-44SC has two steering stations. Two 32 in destroyer style wheels will turn on 1 in. diameter stainless steel shafts supported by bearings on both the inside and outside of the cabin bulkhead.
For the interior steering shaft bearing supports, I chose to laminate 6 layers of glass over 8 inch square pieces of 3/4 in marine plywood.
shaping the bulkhead mounted steering pedestals. As backing plates for the two steering shaft bearings, I used 1//4 in. aluminum.
vac bagging the steering pedestals in place. In the foreground, I have pre cut and shaped triaxial glass to fit the steering mount.
port side
starboard side
port
starboard
For the interior steering shaft bearing supports, I chose to laminate 6 layers of glass over 8 inch square pieces of 3/4 in marine plywood.
starboard side interior bearing plate
port side interior bearing plate
4.05.2012
Time to configure the steering system
One of the challenges that arises when going with the kick up rudder option is that any mechanism designed to rotate the rudder shafts will also need to contend with any changes in geometry as the rudder is allowed to kick back upon hitting a large submerged anvil.
Rather than go with a complicated series of pivot arms, levers, cables chains and sprockets or with a 100 percent hydraulic steering, I have designed a simple, robust system that incorporates dyneema rope, aircraft grade pulleys (one system per hull with an alignment link system between the two. The reason that I decided upon a design of my own were:
1. I engineered it to handle stronger loads than most conventional steering systems..
2. All components are available through Mc Master Carr and a local machine shop.
3. I will be able to repair and maintain this system anywhere in the world without needing to order specialty parts from far away marine supply houses.
4. The system is strong but very lightweight.
Here are a few photos showing some of the details of the design but without a schematic or sketch of the full design, it will be fairly difficult to see how all these details will come together so I will post a full description of my system once it has been completely installed.
Rather than go with a complicated series of pivot arms, levers, cables chains and sprockets or with a 100 percent hydraulic steering, I have designed a simple, robust system that incorporates dyneema rope, aircraft grade pulleys (one system per hull with an alignment link system between the two. The reason that I decided upon a design of my own were:
1. I engineered it to handle stronger loads than most conventional steering systems..
2. All components are available through Mc Master Carr and a local machine shop.
3. I will be able to repair and maintain this system anywhere in the world without needing to order specialty parts from far away marine supply houses.
4. The system is strong but very lightweight.
Here are a few photos showing some of the details of the design but without a schematic or sketch of the full design, it will be fairly difficult to see how all these details will come together so I will post a full description of my system once it has been completely installed.
3.30.2012
3.24.2012
"Mariana"
I made it back from Australia without becoming "grite what shock" fodder and now face the challenge of finishing this Cat.
Since this Cat is yet to be christened "Mariana" here's a news story of the trenches' latest visitor.
James-Cameron-visit to the trench
http://www.csmonitor.com/Science/2012/0324/James-Cameron-makes-final-preparations-for-historic-deep-sea-dive
Since this Cat is yet to be christened "Mariana" here's a news story of the trenches' latest visitor.
James-Cameron-visit to the trench
http://www.csmonitor.com/Science/2012/0324/James-Cameron-makes-final-preparations-for-historic-deep-sea-dive
2.26.2012
rebuilding steam in Australia
In order to rebuild steam for the final push to complete the catamaran build, I have taken a reprieve. At present, I am two weeks into a four week stay in western Australia. Here are a few photo's taken from the last few days:
https://picasaweb.google.com/111189878927312166287/February262012
2.17.2012
2.13.2012
Cheating the winter time
I must confess that I have abandoned my shop and cheated the pacific northwest winter again by visiting wonderful friends in Fremantle, Australia......it's the middle of summer time here and I needed it.
and epoxy doesn't cure well when it's cold so I mustn't feel guilty for the lack of progress on this cat.
Bathers beach, Fremantle Australia
"J" Shed Studios
Working with the renown Greg James for a month:
Imagine wanting to drag whales into the streets of Fremantle enough to carve a tunnel through a bluff. Human beings once did this and thousands of whales were killed and dragged through this tunnel to be rendered into soap, whale oil to burn.
May no whale ever be dragged through this tunnel again!
1.24.2012
1.18.2012
Cat under a cold tin roof
Last night, a weather system rolled in off the pacific north west coast packing 85 mile per hour winds. Good thing I wasn't out there doing a little off shore sailing. However, I awoke to find 16+ inches of snow on top of the shop roof and bony chills ran up my cold spine.
Rather than work on the boat this morning, I thought it best to spend 5 hours shoveling snow off the shop roof.
Here's why:
Here's why:
a 30ft. x 60ft shop sports a total roof surface area of 1,800 ft^2
and here's the rub:
I took a flat blade shovel and sliced out one square foot of this snowfall and placed it on the bathroom scale. Turns out that one square foot of this wet Oregon snow weighed in at over 15.2 lbs.
Multiply that times 1,800 ft^2 and that comes out to be 27,360 lbs of snow on top of a tin roof shop framed out with 2 x 4's.
With a prediction of snow changing over to a wet mix of sleet and rain, this snow could potentially soak up another 5 or 10 lbs per sq ft creating a total snow load of over
22 tons!
After shoveling the snow off the shop, I came inside for a cup of hot chocolate and noticed visible bows in the ceilings of our house, so I shoveled another 15 tons of snow off the roof of the house. Since I didn't have a snow shovel, today I moved 37 tons of snow with an upturned push broom.
"Who said building a boat isn't fun?"
1.16.2012
Anchor roller
Here are the anchor roller plates being fitted with flanges that will allow the anchor roller unit to be attached to the under side of the bow beam. In this photo, I have already formed one of the flanges to fit the mating curve and have yet to bend the the other one. To promote maximum bond strength, I machined a surface texture onto the mating flange. These flanges will then be welded to the anchor roller plates. Once complete, this unit will be bonded to the bow beam by wrapping the flanges with multiple layers of unidirectional glass and carbon fiber. After that, I will most likely wake up in the middle of the night and apply additional wraps of epoxy and carbon fiber in my sleep.
anchor roller plates
Anchor roller mock up
Rather than using construction string for my anchor rode and old paint rollers to secure my anchor, I figure an upgrade is in order.
1.12.2012
The power of Water.....@ 90,000 psi
Water Jet technology is truly amazing. The particular machine that cut these parts uses 90,000 psi water infused with small rubies (garnet). A tiny orifice allows the high pressure water and "grit" to simply wear away anything that come into contact with the stream. This includes, but is not limited to, glass, steel, plastics, wood, stone and...........finger bones.
Here are the side plates of the anchor roller. Next, I will weld flanges onto the concave, curved portions of each plate so that they can be bonded to the lower side of the bow beam. I may take these parts back over to the shop before I do this and have them cut lightening holes in them to save a little more weight. After this, I'll give the parts a good sand blasting and send them off to be anodized.
Here are a few components of my steering system. Hint: After they receive keyways, the blocks are to be bolted around the upper rudder shafts. In later posts, I will reveal the new steering design.
Again, these parts were water jet cut from solid 2 inch thick aluminum plate!
Update:
Rather than run the parts over to the water jet, I just used a hand held saber saw
to cut a couple of lightening holes in the anchor roller plates.
This weight savings gained by the removal of two aluminum discs will allow me to carry one additional beer while marginally affecting strength. When installed, these plates will also have diagonal bracing that will transfer side loads back into the bow beam.
1.06.2012
Espresso blowing in the Wind
So, put your hat on a hat rack and promise not to run screaming away from your computer, your iPad, your nook or your kindle. If you are not particularly electrically inclined, no worries. I myself am a mechanical engineer and I find it difficult to even believe that electrons actually exist.
While building this boat, out of pure curiosity, I inadvertently cobbled together a working "prototype" of an electrical system that was helpful in teaching me how to keep electrons flowing in the right directions. In this example, I've put together a system that allows me to make an espresso from the wind. It would be fairly easy to install this sort of a system on a boat, a motor home or a small cottage in the woods.
All of this stuff is available on the cheap from various local hardware stores and big boxes.
So....as complicated as this may look, it's really pretty simple. It goes like this:
Wind (spins permanent mag alternator)--->
rectifier turns this AC electricity into a variable voltage DC electricity --->
charge controller ( automatically gives the battery the voltage that it needs) ---->
battery bank --->
inverter ( turning DC electricity into 60hz 120V "houshold" electricity)----> espresso
* In this particular system, when the batteries reach full charge, the charge controller diverts any excess electrical energy to a water heater, thus preventing the battery bank from becoming over charged.
If you want to create your own little renewable energy power station, here's what you'll need:
The Stuff
Wind generator: Although you can spend incredible amounts of money on sleek plastic wind generators, I've discovered that a more robust, efficient and powerful generator can be built from pre molded carbon fiber blades, a hub and a permanent magnet alternator. Here's a great source:
Water heater: I found this little heater in a dumpster next to a building renovation project and I replaced the 120v AC element with a 12v DC element that I found at an RV store.
Battery Charger: auto parts store, WalMart and pretty much anywhere that sells stuff for cars.
DC Fridge: this merely represents a typical DC load. I got this from WalMart. It is a really crappy automotive fridge that is supposed to sit on your car seat and keep a six pack cold.
Espresso Maker: Christmas present.
Charge Controller: "Wind Blue" ( do a Google Search)
Gas Generator: Harbor Freight Tools ( also really cheap ) used here as a back up in case the wind stops blowing and stopping the flow of your espresso. (somehow, making an espresso from fossil fuel doesn't see so appetizing)........in fact, I think it's just wrong!
Inverter: big box, auto stores, hardware stores, eBay Cheap ones produce a "modified" 60 hz. sine wave ( made up of a bunch of modulated square waves) while more expensive ones create "true" 60 hz sine wave
Rectifier: also got this from "Wind Blue" It's a really compact unit with a few aluminum fins that help dissipate a little heat that is producedduring the conversion of AC to DV voltage.
The fine print......
None of these components shown here were designed to withstand the marine environment and I've mainly been using them just to teach myself about renewable energy systems. I also use it to power my shop tools just for fun. The good thing about using off the shelf consumer components is that if the smoke leaks out of some of this stuff, you can always go buy a new one without feeling too bad. Unfortunately, to build a system that would be more suited for use on an ocean going vessel, you would have to multiply the price of all this stuff by 10 or 20 if you wanted to order components from marine supply stores. or....I guess you could mount all this stuff in a waterproof pelican case, throw it on board and go for it.
1.01.2012
Time sanding or time in the sand under a palm tree?
The curse of a custom build cat..... After telling myself that I was not going to spend inordinate time fairing , sanding and trying to make the interior like the surface of a Steinway piano, I accidentally spent three days fairing, sanding and making the interior surfaces of the forward starboard cabin like a Stienway piano.
Tomorrow, I'll put the final finish paint on the interior surfaces of this forward, starboard cabin.
12.23.2011
Earths orbit around the sun
I feel the need to apologize for the lack of progress made good towards getting this ship into the waters. My excuse has been the annual decrease in the ambient temperature which tends to reduce my ability to really get things done. Epoxy becomes difficult to work, paint fails to cure, glue doesn't stick and my opposable thumb and fore fingers become ineffective tools.
I see no way to prevent the orbit of our earth around the sun. Endless summers await us when this cat slips into the sea......ah, the thought of spring time in New Zealand and Australia.
Please offer my gift of an uplifting film entitled "Accidental Eden". If you find yourself in the northern hemisphere at this time, make yourself a cuppa and take the time to watch this video.
Unfortunately for us Americans, this place is off limits so for the rest of the worlds travelers, please take care of this place before the embargo is lifted and the cancerous growth of american development threatens to destroy this gem. It's places like this that inspire me to finish this cat.
I see no way to prevent the orbit of our earth around the sun. Endless summers await us when this cat slips into the sea......ah, the thought of spring time in New Zealand and Australia.
Please offer my gift of an uplifting film entitled "Accidental Eden". If you find yourself in the northern hemisphere at this time, make yourself a cuppa and take the time to watch this video.
Unfortunately for us Americans, this place is off limits so for the rest of the worlds travelers, please take care of this place before the embargo is lifted and the cancerous growth of american development threatens to destroy this gem. It's places like this that inspire me to finish this cat.
for the full episode, copy and paste this link into your browser bar:
http://www.pbs.org/wnet/nature/episodes/cuba-the-accidental-eden/introduction/5728/
Happy Holidays to all!
12.06.2011
Learning curves
Here's a rugged and practical edge detail that I came up with for various storage compartment openings. The final detail will include netting that should keep gear in place in the event that we encounter waves on the ocean.
Here are five learning curves. I decided to thermo form 3/4 in. PVC pipe for use as edge detail around the openings in composite panels. As you can see, it took me a while to work out a method to produce smooth curves. After many failed attempts. I settled in on the following technique. I found that uniform curves can be made by filling a section of pipe with sand and capping the ends. I then used a heat gun to heat the bend area. In order to produce a uniform bend, it was necessary to apply differential heat to the bend area. To keep the inner bend radius from wrinkling, if the outer bend area is kept slightly hotter, this allows it to stretch while the cooler inner portion resists the compressive forces that would otherwise cause the pipe to wrinkle.
Once I produced shapes that matched my openings, I then set the guide of my table saw to allow me to cut a section out of the pipe to create edging.
Here's one of the interior storage openings fitted with the edging.
and again, here's a few examples of this edging being used around two storage compartments that are located inside the cockpit.
Subscribe to:
Posts (Atom)