4.12.2011

Battery placement

According to the plans, all fixed heavy items should be located in an area centered just forward of the mast bulkhead.  As outrageous that it may seem that any vehicle would contain both lead and carbon fiber, for over one hundred years, you still can't beat lead acid in terms of $/ Ahr. That said, for house power storage, I decided to use two 225Ahr 4D AGM batteries so that I can install one in each hull at the fore/aft center of buoyancy.

Two Deka Sea-Mate 4D AGM batteries

 Here is a photo taken from inside the forward, port side hull looking back towards the stern of the boat.  I used some scrap foam pieces to make a mock battery and after just about scratching the hair off my head, I was able to choose a location to build a battery box. The other battery will be located in the starboard hull; mirror image.


4.11.2011

strange lights in the dark.


Today, I noticed a strange phenomenon.  In a darkened portion of the boat, as I pulled a strip of peel ply away, I noticed that a blue-purple light emanated from the separation point.

Since my brother has a masters degree  in organic chemistry, I have asked him to post a comment as to why this happens. click on the comment section below this post.

My guess is that it is similar to what causes this:  try it........

If you are living the American lifestyle, go outside and look under the passenger side floorboard of the car that you drive the most.  Pick up all the loose change that you find.  Tell your wife, girlfriend, boyfriend or partner that you have an important errand to run.  ( if you are single, no need to tell anybody anything).  Drive to the closest all night grocery store and buy yourself a roll of wintergreen lifesavers.  While you are there, stop by  the flower section and also buy a small bunch of flowers.  This will increase the possibility that you will not be alone when you finish your boat. If you are also fortunate enough to have teeth, at night, go to the bathroom mirror.  If you have been affected by the recession and find yourself without a bathroom mirror, you are not alone. If you are living on the streets, you are also not alone. Regardless, at night, go find a side mirror of a large automobile. Take this opportunity to look at yourself in the mirror and tell yourself that you ARE a good person and that you CAN finish a boat.  Look at the inside of your mouth and with your back teeth, bite down hard on the life saver.  You will see a bright flash of light.  Do not let this frighten you. 


4.10.2011

Todays epoxy session


Before mixing any epoxy, I have trained myself to prepare the glass reinforcement pieces before hand. Also, when the need arises to apply double biased tape along the seams of vertical and horizontal surfaces, I have found it easier to first saturate the fabric on a piece of thick plastic sheeting, lifting it off then smoothing it in place by hand.


Here are the containers that I use to mix batches of fillet material.  from right to left:

1.  epoxy resin mixing pitcher ( I usually mix 1 qt part A to 1/2 qt B)
2.  micro balloon / epoxy mixing container ( a 1 gallon jug with the top handle part cut off ) This particular gallon container is made of a very tough and flexible plastic that allows me to bang it on the table the next day to remove all the last work sessions cured epoxy so that I can keep using the same container. 
3.  Zip lock bag holder
4.  spreaders are seen here in the lower part of the photo

pouring the mixed epoxy into the micro balloon mixing container.

To arrive at a mixture with the consistency of peanut butter, I fill the cut off gallon jug right up to the top with micro balloons along with a qt and a half of mixed epoxy.....

after mixing, I scoop the whole glob of fillet material into my zip lock bag.....

 
zip it up, cut off the corner of the bag and the fillet material can be applied in a controlled manner by just squeezing the bag.

Here's an example of an end result using fillet material, epoxy saturated double bias glass tape all topped off with peel ply.  Again, notice the numbers written on both the surfaces and the pieces of reinforcement material to allow me to know where to put all the pieces. In this case, it's bonding the end of the bow tube in place.  


4.06.2011

Internal bedding in of the bow tube


Out of respect for the confidentiality of the F-44SC designer, I rarely include direct information taken from the plan set. However, in this instance, I am including a small portion to merely show the high degree of detail that is provided in the licensed plan set.  Here is an excellent example of how the plans offer unparalleled descriptions of all critical assembly details. 

Here, I have laminated several sections of core cell foam to create the end caps.

I am test fitting the foam cap in preparation of bonding the entire area with micro balloon fillets and two layers of double bias glass tape.


4.04.2011


 It's sometimes good to step back and remind yourself that it's a boat that you are building.....otherwise it just seems like a big pile of foam, glass and epoxy.


here I am standing low
 lower 

 lowest....


Here, you can see the bow beam which is now bonded to the hulls; inside and out.

inside sub bulkhead


The sub bulkhead also incorporates a web that utilizes 4 layers of unidirectional glass to help distribute the cross beam loads into the forward hulls. Here I have prepared the glass reinforcements in preparation of saturating them in epoxy and laminating them in place.


  here is the finished structure as seen in the forward starboard hull.........since this is a cat, there is now a mirror image of this work inside the port side hull as well. As a reminder of where the pre fitted glass pieces should go, I use a sharpy pen to label them and this always shows though. 

3.21.2011

sub bulkhead

One of the jobs that I had left for the winter time was to bond the forward sub bulkheads in place.  These bulkheads help distribute the bow beam loads into the forward portions of the hulls.
The bulkhead was bedded in with generous fillets and taped in place with 6 inch and 4 inch wide double bias tape backed with stranded mat. Over this, I used 8 inch wide strips of peel ply to smooth all the corners. This bulkhead will also receive a small stiffener laminated with unidirectional glass which will be bonded to the end of the bow beam and continuing downwards onto the sub bulkhead. 

3.17.2011

engine controls

Being a twin engine craft, I needed to be able to  control both engines, at both steering stations.  To do this, I opted to go with two single function controls each side.   With these controls, the boat should be able to be maneuvered like a battle tank or bull dozier .........I'll no doubt have to deal with a bunch of cables but the alternative is to spend thousands on electronic controls.  The trick will be figuring out a way to mount them so that they do not take up too much space down below in the aft cabins....... Maybe I'll need to build pedestals for them?........I'm just making stuff up as I go.


3.16.2011

forward cabin floor boards

Rather than have one big floor panel in the forward cabins, I chose to create two floor panels for a total of four; starboard / port. I used cardboard to make templates that I could check for fit.  Once I got the shape, traced around the templates onto 1  1/4 inch foam then vac bagged them all in one shot.


3.14.2011

forward cabin floors

The two forward cabins offer a good amount of floor space and I have chosen to create floor board edge mounts which will allow me to create removable floor panels. Seen here is the forward, starboard hull cabin area. I've bonded the edge mounts in place with double bias glass tape and epoxy then used strips of peel ply to minimize the need for any sanding. Note: the cross wise floor stiffener is made up of multiple layers of 4 in wide core cell foam bonded in place with a full layer of 24oz triaxial glass. Each forward cabin will have two floor boards with the edges meeting along the hull stiffeners. This will allow me to create a shower pan floor board with a drain  that will allow the bilge area beneath to become a catchment for the shower.  A bilge pump can then be added to empty the used shower water.........as odd as it may be to some, a recirculating shower system can help to conserve fresh water by allowing ample wash water flow which can then be finished off with a final fresh water rinse.

3.11.2011

compassion to those affected


3.02.2011

sunshine

Boat progress is painfully slow but I found the sun in Kihei, Maui.  Oregon in the winter time is no place for epoxy.........nor is it a place for myself and an unfinished boat.  

2.21.2011

Galley sneak preview


Here's a sneak preview of the interior galley fit out.  I've chosen a bottle glass counter top laminate with toasted bamboo veneer covering epoxy/glass composite panels. In the foreground, you can see the Fridge freezer with the evaporator plate in position. The fridge/freezer will have a divider with its own thermostatically controlled spillover fan that will draw cool air from the freezer side to maintain a pre set fridge temperature.  As a finish detail, I've located a source of original 1950's aluminum edge trim for all the counter tops. 

1.26.2011

Land Yacht

While in Santa Cruz, I spent some time helping my brother replace a holding tank in his 67 Land Yacht.


Lot's to learn from the design that went into the early airstreams

1.24.2011

A visit to the spar builder

Flew to California to meet with Ballenger Spars  who will prepare the mast for this cat.  Follow the link to see their work.

http://www.ballengerspars.com/index.html  

1.23.2011

Grandaddys' hand saw

Here's the last set of the multiple panels required to build out the main interior seating.


If I planned to build ten more 44ft. performance cruising catamarans, It would be worth it to produce 3D computer renderings of the interior then have all the panels CNC cut. However, since this is the only Ocean going cruising cat I will ever build in this lifetime, it made more since to grab the foam and go at it in the design-build manner. These days it's easy to create virtual living spaces on a computer, but nothing can beat using your hands to arrive at a configuration that just feels right. Sometimes technology is a bit over rated and it's good to know when and when not to use it.......I guess I could have used an etch-a- sketch to draw the panels, used a digital camera to capture the image, convert the image to a .dxf file that could be converted to machine tool language that could control a $500,000.00 water jet cutter but I just used my Grandaddys' hand saw instead.

1.21.2011

yellow sealer tape

To make good headway on completing the galley booth, I had to break out the 8 x 12 ft vac bag table and perform another marathon session.  This time, I decided to maximize the entire surface area by nesting the panels together so that they pretty much consumed the entire surface area of my table. For this mega vacuum bag, I used vac bag membrane on top and bottom because I was not sure that my table was completely air tight.  This took two rolls of yellow sealer tape.......say that ten times:   "Yellow sealer tape" "Yellow sealer tape""Yellow sealer tape""Yellow sealer tape""Yellow sealer tape""Yellow sealer tape"..........too much time in the shop makes Jack a dull boy.

booth panels

Again......another impromptu post cure oven


1.19.2011

no place to sit...

After careful attention to human factors and proportion, what took about two days to put together came apart in about 5 minutes. Reason being is that the interior booth seating shapes have to be sheathed with bi axial glass and epoxy to give them strength.  Once the entire seating area is finished it will only weigh about 25 lbs.  If it were built in conventional plywood, I imagine it would weigh in at over 75 lbs. ...simplify and add lightness is still the mantra. The booth is constructed of structural foam sheathed with epoxy and glass and will be upholstered in a doe leather marine-tex.

An experiment in the reduction of production time

Faced with the prospect of having to laminate over 25 separate panels for the interior bridge deck galley area, I decided to run an experiment in vacuum bagging multiple layers and panels all under one vacuum bag. Did it work? I think it did but given the marathon layup session and a bit of a hassle peeling all the layers of peel ply perf and breather off,  I'm not sure if I'll be so bold in the future.

Here's the result:

That's a total of 11 separate panels laminated front and back and stacked all under one vacuum bag.

It went like this: 

lower part of the bag ( vinyl flooring on a temp floor panel)
plastic membrane to keep the lot from sticking to the vinyl flooring
peel ply
glass
foam
glass
peel ply
perf
peel ply
glass
foam
glass
peel ply
perf
peel ply
glass
foam
glass
peel ply
perf
breather
top vac bag.
beer

I think it was worth it because it would have taken me at least a week to use the peel ply bondo spreader method to bond both sides of the 11 panels that I made in one night. 

Here's a few tricks that I learned.
pull the individual groups of panels up and lean them against something
I used a few wooden wedges to separate the groups of panels
( this wasn't that difficult)
score the individual panel edges with an angle grinder on both sides along the panel seams then pop them apart like sheet rock.
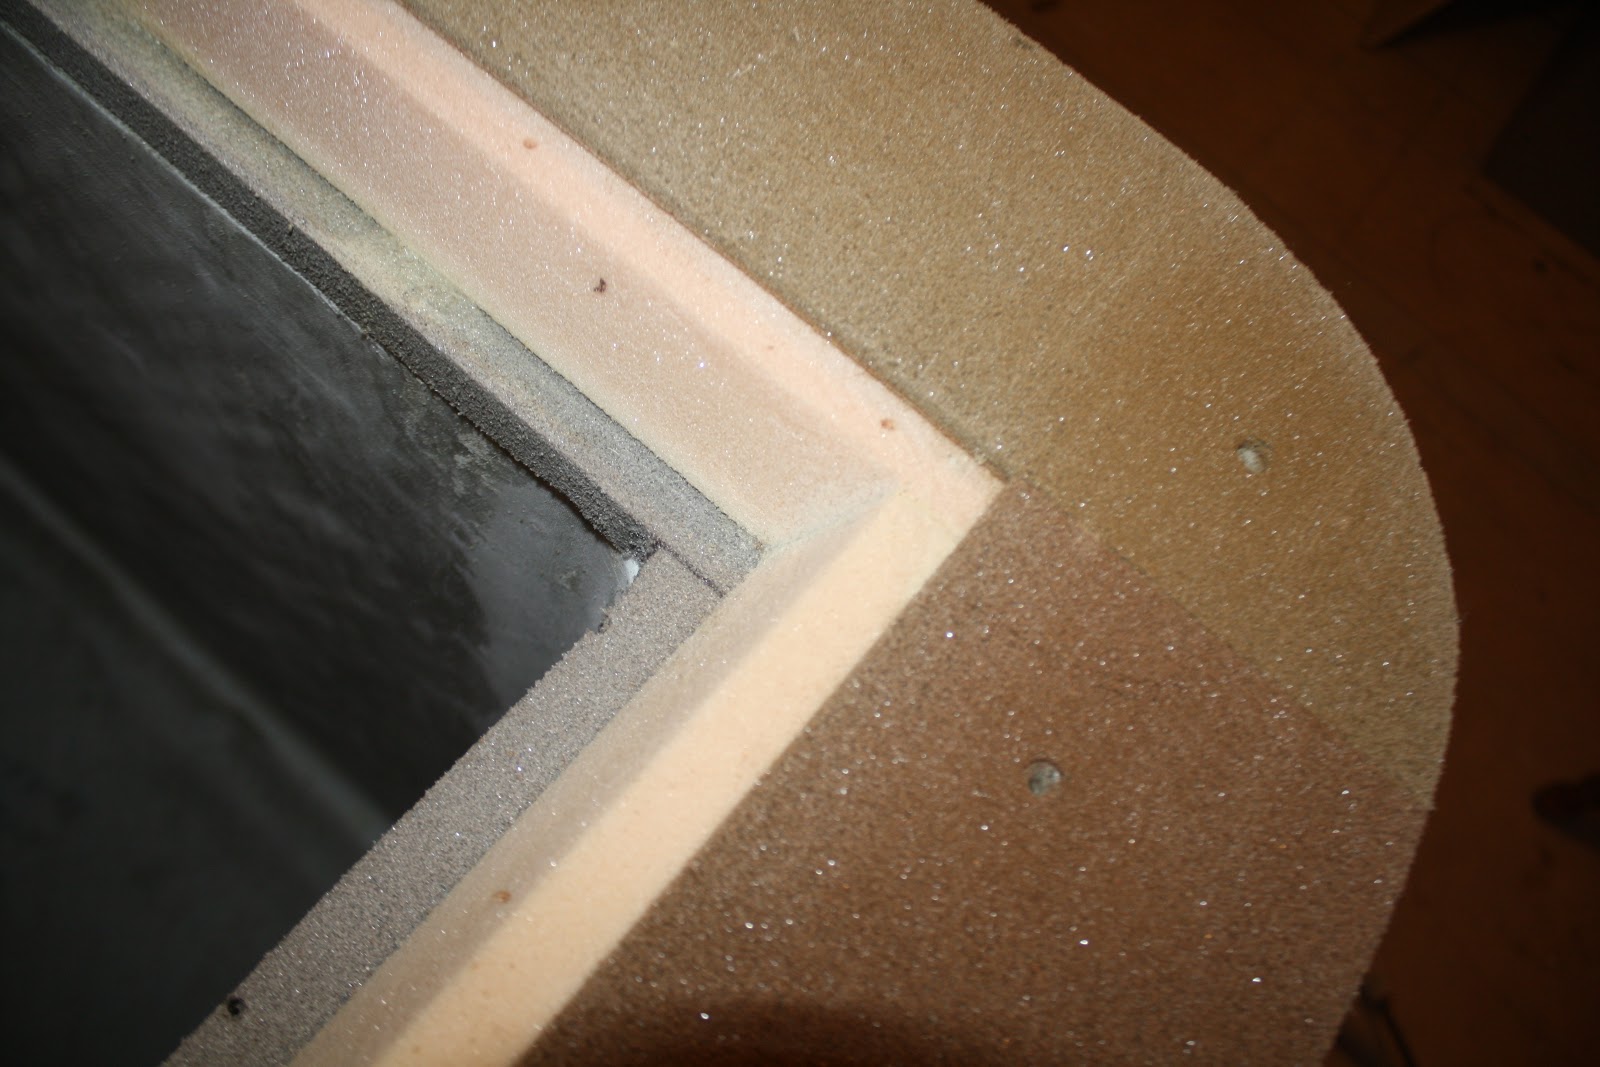
After pulling off all the peel ply, I did have a few flaws where excess resin gathered but nothing a little sanding won't fix.

would I try this again?  Maybe not.  I may just turn on some good music and lay some panels up one at a time for a while.  If I were in a race to produce the most panels in a day I may give it another go but I can think of a few more enjoyable ways to spend an evening.


1.18.2011

More icebox excitement

True.....how exciting can an Icebox be?
For effect, imagine you were a hundred years back in time and you told someone that you could make ice from sunshine and wind. ( solar panels and wind generators).....now that would be more exciting.

Here's the box with the last round of glassing which makes her 100 percent part of the integrity of the boat. The location of the unit actually provides structure to the cabin bulkhead itself and if I ever get blue water smashing against the outer cabin bulkhead, I'm confident that this unit will act as a dresser drawer against a door knob.

All the box components are now bonded together and peel ply was used to minimize the sanding required to prep the sides for a caramelized bamboo veneer that I have chosen as a final finish.  The top work surface will be covered with "Wilson Art" bottle glass Formica and once the insides are glossed over with white epoxy, I'll load it with the works: condenser, compressor, keel cooler, and a spill-over thermostat for the refrigerator portion.  


I've chosen a 40 inch condenser plate and followed the instructions to bend 3 in. dia corners so that it can be mounted inside the ice box so that it will allow one half of the box to be a freezer and the other half the fridge.. Note the keel cooler on the left.

1.11.2011

Fridge / freezer box: a plan from top to bottom


From all manner of sources, an important aspect of any top loading fridge / freezer is a double sealed top. In my case I created the profile by using three different thicknesses of foam which I will glass and vacuum bag to create a wrap around top that I will bond to the flush top of the cabinet. The next few steps will be to build the butterfly opening top with double seals, bond a Formica laminate to the top surface of the cabinet box and top, apply a two ply bamboo veneer to the outside of the box for cosmetics then finish the box with an aluminum strip of edging to give it a nice professional look. 

From top to bottom, here's my plan:
  1. icebox top surface smoothed to accept chamfered opening ( steps 2, 3 and 4)
  2. nest layer of 3/4 in dyvinicell foam,  1 1/4 inch beveled layer of foam
  3. 1/4 inch spacer which will be covered with 6 ply cabinit grade plywood
  4. final surface laminate to top
  5. veneer exterior cabinet
  6. install edging
  7. apply internal glazing ( a simple rolled on mixture of epoxy, titanium dioxide and cabosil to prevent "running" This I have found produces a thick, rock hard glossy surface that is easy to clean and avoids all the labor of having to spray expensive automotive coatings such as deadly polyurethane imron or synthetic enamels. 
  8. Install the guts ( a modular Fridgoboat system http://frigoboat.com/)
  9. Install evaporator
  10. Components: (The guts)
  11. 200F Evaporator - 40.25"w x 10.5"h, Flat Plate
    install compressor

  12. K50-AEO with AEO control 
    (This unit has an electronic "smart" speed control that automaticly adjusts the compressor RPM to provide the precise amount of refrigeration necessary for the job at hand so that the unit runs at a lower rate for a longer time thereby creating higher efficiencies than if it were to rune wide open for shorter times.) 

  13. install keel cooled condenser to prevent cabin heat buildup in the tropics
  14. Keel Cooler thread-mounted condenser
    Install freezer thermostat
    Thermostat, Coastal Digital Fahrenheit and Celsius 12v
  15. Install spill over unit
Spillover fan/thermostat kit, mechanical


This device pulls cold air from the freezer section and dumps the right amount of chilled air into the refridgerator portion while excess air flows back into the freezer portion.  This thermostat can be set above freezing while the freezer unit can be set well below freezing as desired....
    I plan on trailing a fishing line off the transom and packing this freezer with fish for my family. Not to mention "ice for the blender that will soon render that tropical concoction that helps one hang on"

    1.10.2011

    pouring the foam

    Here's the fridge / freezer cabinet after positioning the ice box in place and pouring a 2 lb /ft ^3 expanding polyurethane foam. I measured out enough to fill the bottom and then started filling the side cavities with smaller batches until the foam expanded up beyond the top. I then ran a hand saw around the top to level the foam. This fridge / freezer will have a butterfly top that will allow individual access to each compartment.  

    1.08.2011

    Roughing in the Fridge / Freezer

    I chose to place the fridge right next to the cabin door so that cold drinks can be readily available to the skipper.

    The interior panels have been sheathed one side with a 12 oz. biaxial glass and epoxy.  To prevent infra red  heat absorption, the inner side of the outer cabinet will be lined with a thin aluminum foil. The surrounding void between the ice box shell and the cabinet will then be filled with a two part expanding polyurethane foam.  

    1.06.2011

    mocking up the cabin booth seating

    Here I am making a layout of the seat profile that I will build inside the cabin. I spent countless hours studying human factor design books in order to insure that when I want to kick back and have some cookies and milk, I'll be nice and comfortable.